
How to Use Wood Chips as Mushroom Substrate
Share
How to Use Wood Chips as Mushroom Substrate
Wood chips have long been a favorite substrate among mushroom cultivators, particularly for outdoor and low-tech growing operations. Their accessibility, low cost, and effectiveness make them an excellent choice for both novice and experienced growers. In this comprehensive guide, we'll explore the ins and outs of using wood chips as a mushroom substrate, from selection and preparation to inoculation and maintenance.
Why Choose Wood Chips for Mushroom Cultivation?
Before we dive into the how-to, let's consider why wood chips are such a popular choice for mushroom cultivation:
- Accessibility: Wood chips are widely available, often for free from local tree services or landscaping companies.
- Cost-effectiveness: Compared to other substrates, wood chips are typically very affordable, especially in bulk.
- Versatility: Wood chips can be used for a variety of mushroom species, particularly those that naturally grow on wood.
- Outdoor cultivation: Wood chips are ideal for outdoor beds and garden cultivation, mimicking natural growing conditions.
- Long-term production: A well-prepared wood chip bed can produce mushrooms for several years with proper maintenance.
Now that we understand the benefits, let's explore how to effectively use wood chips as a mushroom substrate.
Selecting the Right Wood Chips
Not all wood chips are created equal when it comes to mushroom cultivation. The type of wood and the size of the chips can significantly impact your success. Here's what to consider:
Wood Type
The best wood chips for mushroom cultivation come from hardwood trees. Some excellent choices include:
- Oak
- Maple
- Beech
- Alder
- Poplar
- Ash
Avoid using wood chips from coniferous trees (like pine or cedar) as they contain resins that can inhibit mushroom growth. Also, steer clear of wood from allelopathic trees like eucalyptus or black walnut, which produce compounds that can inhibit fungal growth.
Chip Size
The ideal size for wood chips used as mushroom substrate is generally between 1/2 inch to 2 inches in diameter. This size range provides a good balance of surface area for mycelial colonization and adequate air spaces for proper gas exchange. Chips that are too small can compact and reduce aeration, while those that are too large may dry out quickly and provide less surface area for the mycelium to colonize.
Freshness
Freshly chipped wood is often the best choice for mushroom cultivation. Fresh chips contain more nutrients and moisture, which can benefit the growing mycelium. However, if using fresh chips, be aware that they may require a period of weathering or composting to reduce their natural anti-fungal properties.
Preparing Wood Chips for Mushroom Cultivation
Once you've sourced your wood chips, the next step is to prepare them for inoculation. This process involves several steps to create an optimal environment for mushroom growth:
1. Weathering
If you're using fresh wood chips, it's often beneficial to let them weather for a few weeks to a few months before use. This process helps to leach out some of the wood's natural anti-fungal compounds and begin the breakdown of complex lignins, making the substrate more accessible to mushroom mycelium.
To weather your chips:
- Pile the chips in a location with good drainage.
- Leave them exposed to the elements for 2-6 months.
- Occasionally turn the pile to ensure even weathering.
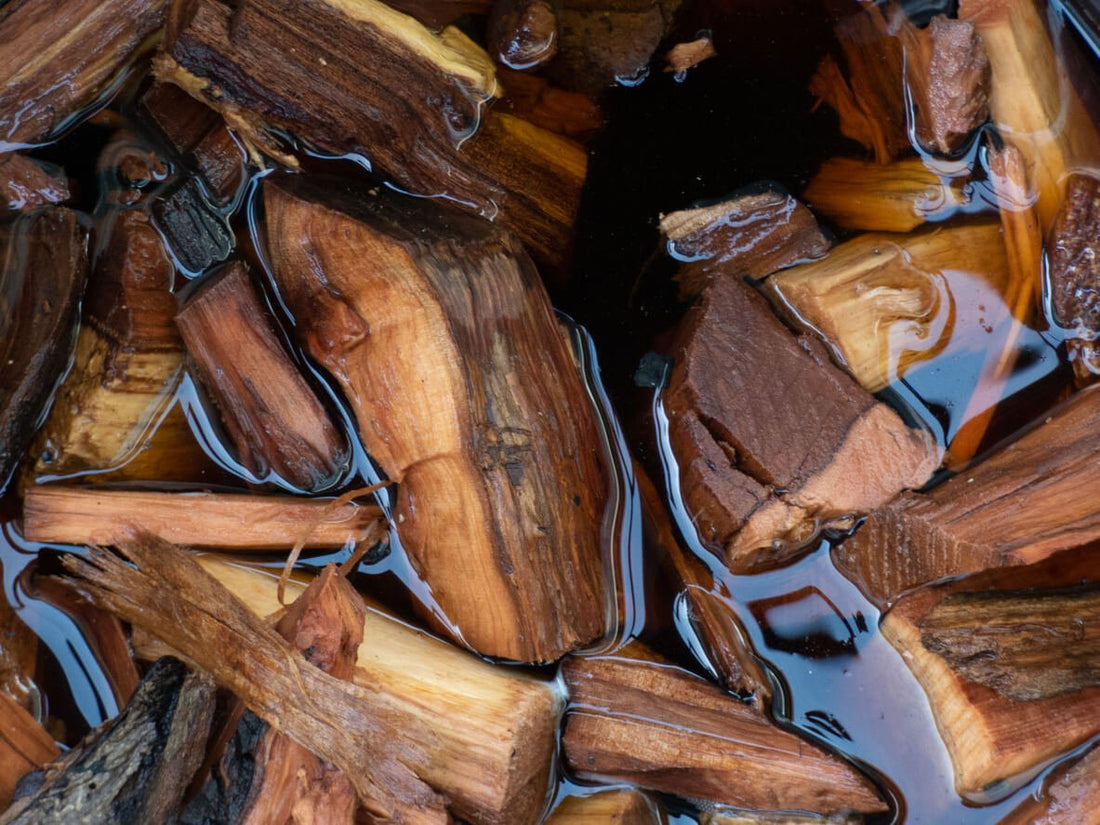
2. Hydrating
Proper hydration is crucial for successful mushroom cultivation. Wood chips should be thoroughly moistened before use. Here's how to hydrate your chips:
- Submerge the chips in water for 24-48 hours.
- Drain the excess water. The chips should be wet but not waterlogged.
- Perform a squeeze test: when you squeeze a handful of chips, a few drops of water should come out, but not a stream.
3. Pasteurization or Sterilization
To create a clean growing environment for your mushroom mycelium, it's important to reduce competing organisms in your wood chip substrate. This can be done through pasteurization or sterilization:
Pasteurization
Pasteurization is often sufficient for outdoor cultivation and can be done using the following methods:
- Hot water bath: Submerge the chips in water heated to 65-82°C (150-180°F) for 1-2 hours.
- Steam pasteurization: Steam the chips for 2-3 hours, ensuring the internal temperature reaches at least 65°C (150°F).
Sterilization
For more controlled indoor cultivation, you might opt for full sterilization:
- Pressure cooker: Sterilize the chips in a pressure cooker at 15 PSI for 2-3 hours.
- Autoclave: If available, use an autoclave following manufacturer guidelines for wood substrates.
After pasteurization or sterilization, allow the chips to cool to room temperature before inoculation.
Inoculating Wood Chips with Mushroom Spawn
With your wood chips prepared, it's time for the exciting part - inoculation! This is where you introduce mushroom mycelium to colonize the substrate. Here's how to do it:
Choosing Your Spawn
Several types of mushroom spawn can be used to inoculate wood chips:
- Grain spawn: Fast-colonizing and nutrient-rich, ideal for indoor cultivation.
- Sawdust spawn: Great for outdoor beds, mimics natural wood colonization.
- Plug spawn: Easy to use for outdoor log or stump cultivation.
- Liquid culture: Can be mixed with water and sprayed onto the chips for even distribution.
Inoculation Process
- Prepare your working area: Clean and sanitize your workspace to minimize contamination risks.
-
Layer method:
- Spread a 2-3 inch layer of wood chips.
- Sprinkle spawn evenly over the surface.
- Add another layer of chips and spawn.
- Repeat until your container or bed is full.
- Finish with a thin layer of chips on top.
-
Mix method:
- In a clean container, mix wood chips and spawn thoroughly.
- Aim for a spawn rate of 10-30% by volume, depending on the species and conditions.
- Transfer the inoculated mixture to your final growing container or bed.
- Cover the inoculated substrate: Use a breathable material like cardboard, burlap, or straw to help retain moisture and protect from contaminants.
Incubation and Fruiting
After inoculation, your wood chip substrate enters the incubation phase, where the mycelium colonizes the chips. This process can take several weeks to several months, depending on the mushroom species, environmental conditions, and size of your substrate bed.
Incubation Conditions
- Temperature: Maintain temperatures optimal for your chosen mushroom species, typically between 20-30°C (68-86°F).
- Humidity: Keep the substrate moist but not waterlogged. A humidity level of 80-90% is generally ideal.
- Light: Most mushroom mycelium prefers darkness during colonization.
- Air exchange: Some air exchange is beneficial, but avoid drafts that could dry out the substrate.
Monitoring Colonization
As the mycelium colonizes the wood chips, you'll notice white, thread-like growth spreading through the substrate. This is a good sign! Monitor for any unusual colors or odors that might indicate contamination.
Initiating Fruiting
Once the substrate is fully colonized, it's time to initiate fruiting. The exact process can vary depending on the mushroom species, but generally involves:
- Lowering the temperature slightly (species-dependent).
- Increasing fresh air exchange.
- Providing indirect light.
- Maintaining high humidity, often through misting.
For outdoor beds, these conditions often occur naturally with changing seasons.
Maintaining Your Wood Chip Mushroom Bed
A well-prepared wood chip mushroom bed can produce harvests for several years with proper maintenance. Here are some tips to keep your bed productive:
Moisture Management
Consistent moisture is crucial for mushroom growth. In dry periods, water your bed deeply. In rainy seasons, ensure proper drainage to prevent waterlogging.
Supplementation
As the wood chips break down over time, you can supplement the bed with fresh chips or other organic materials to provide ongoing nutrition for the mycelium.
Pest Control
Monitor for pests like slugs or insects that might damage your mushrooms. Use appropriate organic control methods as needed.
Harvesting
Harvest mushrooms when they reach maturity, typically just as the cap fully opens. Use a sharp knife to cut the mushroom at the base, leaving the myceliated substrate undisturbed.
Troubleshooting Common Issues
Even with careful preparation, you might encounter some challenges when using wood chips as a mushroom substrate. Here are some common issues and how to address them:
Slow Colonization
If your mycelium is growing slowly:
- Check temperature and humidity levels.
- Ensure your wood chips aren't too fresh or from inhibitory species.
- Consider increasing your spawn rate in future inoculations.
Contamination
If you notice molds or unpleasant odors:
- Remove heavily contaminated sections if possible.
- Increase air circulation to discourage mold growth.
- Review your pasteurization or sterilization process for future batches.
Drying Out
If your substrate is drying out:
- Water deeply and consider adding a moisture-retentive casing layer.
- Adjust your watering schedule or setup to maintain consistent moisture.
Conclusion: Mastering Wood Chip Cultivation
Using wood chips as a mushroom substrate offers a rewarding and often highly productive cultivation method. By understanding the principles of wood selection, preparation, and maintenance, you can create thriving mushroom beds that produce harvests for years to come.
Remember, success in mushroom cultivation often comes with experience. Don't be discouraged by initial setbacks - each attempt provides valuable learning opportunities. With patience and practice, you'll soon be enjoying bountiful harvests of delicious, homegrown mushrooms from your wood chip beds.
Whether you're setting up a small backyard operation or planning a larger-scale cultivation project, wood chips provide an excellent foundation for your mushroom growing journey. Happy cultivating!
Frequently Asked Questions
Q1: Can I use wood chips from my local garden center for mushroom cultivation?
A1: While it's possible, be cautious with store-bought wood chips. Ensure they're from hardwood trees and haven't been treated with any chemicals or preservatives. Fresh chips from a known source are generally preferable for mushroom cultivation.
Q2: How long does it take for mushrooms to fruit after inoculating wood chips?
A2: The time to fruiting can vary greatly depending on the mushroom species, environmental conditions, and size of your substrate bed. It can range from a few months to over a year for some species. Patience is key in mushroom cultivation!
Q3: Can I mix different types of wood chips for mushroom cultivation?
A3: Yes, you can mix different hardwood chips. In fact, this can sometimes provide a more diverse nutrient profile for your mushrooms. Just ensure all the woods are suitable for mushroom growth (i.e., avoid coniferous or allelopathic species).
Q4: Do I need to sterilize wood chips for outdoor cultivation?
A4: For outdoor cultivation, full sterilization is often unnecessary and impractical. Pasteurization or even thorough soaking can be sufficient. The natural resilience of outdoor-appropriate mushroom species often allows them to outcompete contaminants in a less sterile environment.
Q5: Can I reuse wood chips after a mushroom harvest?
A5: Yes, wood chip beds can often produce multiple flushes of mushrooms over several years. As the chips break down, you can supplement with fresh material to extend the bed's productive life. However, if you notice decreased yields or signs of contamination, it may be time to start a new bed.