
How to Prepare Coffee Grounds as Mushroom Substrate
Share
How to Prepare Coffee Grounds as Mushroom Substrate
Using coffee grounds as a mushroom substrate is an excellent way to grow mushrooms at home while recycling waste that would otherwise be discarded. Coffee grounds are rich in nutrients like nitrogen, making them an ideal growing medium for mushrooms, particularly oyster mushrooms. In this comprehensive guide, we’ll walk you through the steps to prepare coffee grounds as a mushroom substrate, discuss the benefits of using coffee grounds, and provide tips for maintaining a healthy growing environment. Whether you’re a beginner or an experienced grower, this guide will help you make the most of this sustainable and effective substrate.
Key Takeaways
- Coffee grounds are a nutrient-rich, eco-friendly substrate for growing mushrooms, particularly oyster mushrooms.
- Proper preparation of coffee grounds involves collecting, drying, pasteurizing, and mixing them with other materials to create an optimal growing environment.
- Maintaining the right moisture levels and monitoring for contamination are essential for successful mushroom cultivation using coffee grounds.
Why Use Coffee Grounds as a Mushroom Substrate?
Coffee grounds are an excellent substrate for mushroom cultivation for several reasons. First, they are rich in nutrients, particularly nitrogen, which is essential for mycelium growth. This makes coffee grounds an attractive option for growing fast-growing species like oyster mushrooms. Second, using coffee grounds helps reduce waste, making it an eco-friendly choice for home growers. By repurposing used coffee grounds, you’re not only growing your own food but also contributing to a more sustainable environment.
Additionally, coffee grounds are widely available and often free, making them a cost-effective option for home mushroom cultivation. Many local cafes and coffee shops are more than happy to give away their used coffee grounds, providing a steady supply of substrate material without any extra cost.
Nutrient Content of Coffee Grounds
Coffee grounds are packed with nutrients that are beneficial for mushroom growth. They contain nitrogen, phosphorus, potassium, and other trace minerals that support mycelium development and fruiting. The high nitrogen content, in particular, makes coffee grounds an ideal substrate for fast-growing mushrooms like oysters.
However, coffee grounds alone may not provide a complete nutrient profile for all types of mushrooms. For this reason, they are often mixed with other materials, such as straw, sawdust, or coco coir, to create a more balanced substrate that meets the needs of different mushroom species.
Eco-Friendly Benefits of Using Coffee Grounds
Using coffee grounds as a mushroom substrate is an eco-friendly choice that helps reduce waste and repurpose a common household item. Coffee grounds are one of the most widely available organic wastes, with millions of tons produced globally each year. By using them as a substrate, you’re diverting this waste from landfills and putting it to good use in growing food.
In addition to reducing waste, coffee grounds also have a lower environmental impact compared to other substrates that may require additional processing or transportation. By sourcing your coffee grounds locally, you’re further minimizing your environmental footprint and supporting sustainable agriculture practices.
Step-by-Step Guide to Preparing Coffee Grounds as Mushroom Substrate
Preparing coffee grounds as a mushroom substrate involves several key steps, including collection, drying, pasteurization, and inoculation. Here’s a detailed guide to help you get started:
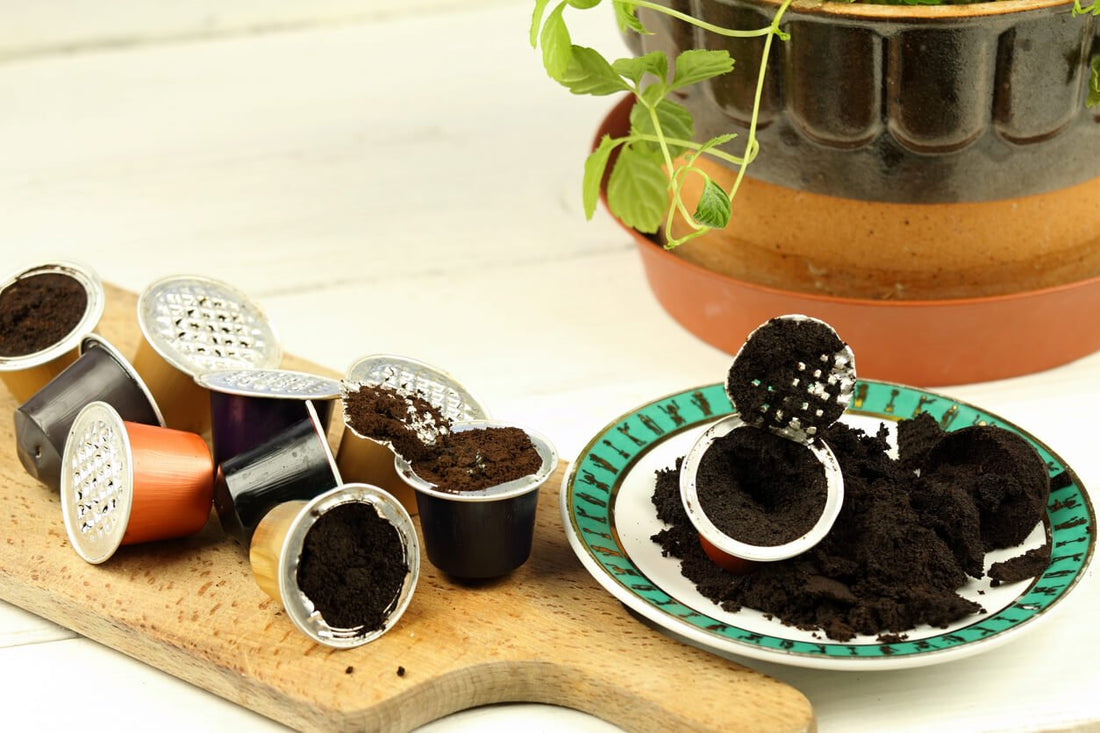
Step 1: Collecting Coffee Grounds
The first step in preparing coffee grounds as a mushroom substrate is collecting the grounds. You can source coffee grounds from a variety of places, including your own kitchen, local cafes, or coffee shops. Here’s how to go about it:
- Start with Your Own Supply: If you’re a regular coffee drinker, start by saving your used coffee grounds. Store them in an airtight container or bag in the refrigerator or freezer to prevent mold growth.
- Visit Local Cafes: Many cafes and coffee shops are happy to give away their used coffee grounds. Bring your own container and ask the staff if you can collect the grounds. Some cafes even have dedicated containers where customers can take used grounds for free.
- Avoid Contaminants: Make sure the coffee grounds you collect are free from contaminants such as dairy, sugar, or other additives. These can introduce unwanted bacteria or mold into your substrate, which could harm your mushroom grow.
Step 2: Drying the Coffee Grounds
Once you’ve collected your coffee grounds, the next step is to dry them. Drying the grounds helps prevent mold growth and makes them easier to store until you’re ready to use them. Here’s how to dry coffee grounds:
- Spread the Grounds: Spread the coffee grounds in a thin layer on a baking sheet or tray. Ensure the layer is even to allow for consistent drying.
- Air Drying: Place the tray in a well-ventilated area, such as near a window or on a countertop, and allow the grounds to air dry for 24-48 hours. Stir the grounds occasionally to ensure even drying.
- Oven Drying (Optional): If you’re in a hurry, you can dry the coffee grounds in the oven. Set the oven to its lowest temperature (around 200°F or lower) and bake the grounds for 30-60 minutes. Keep the oven door slightly ajar to allow moisture to escape.
- Check for Dryness: The coffee grounds are dry when they feel light and crumbly to the touch. Once dry, store the grounds in an airtight container until you’re ready to use them.
Step 3: Pasteurizing the Coffee Grounds
Pasteurization is an important step in preparing coffee grounds as a mushroom substrate. This process involves heating the grounds to eliminate any harmful microorganisms that could compete with the mushroom mycelium. Here’s how to pasteurize coffee grounds:
- Boil Water: Bring a large pot of water to a boil. You’ll need enough water to fully submerge the coffee grounds.
- Prepare the Grounds: Place the coffee grounds in a heat-resistant container, such as a mesh bag or pillowcase, that can be easily submerged in water.
- Submerge in Boiling Water: Carefully submerge the container of coffee grounds into the boiling water. Use a weight, such as a clean rock or heavy plate, to keep the grounds fully submerged.
- Maintain Temperature: Lower the heat and maintain the water temperature at around 160-170°F. Keep the grounds submerged at this temperature for 60 minutes to ensure proper pasteurization.
- Drain and Cool: After 60 minutes, remove the container from the water and allow the coffee grounds to drain and cool to room temperature. Spread them out on a clean surface or tray to speed up the cooling process.
Properly pasteurized coffee grounds provide a clean, controlled environment that supports healthy mycelium growth. Once the grounds have cooled, they’re ready to be inoculated with mushroom spawn.
Step 4: Mixing Coffee Grounds with Other Substrate Materials (Optional)
While coffee grounds are nutrient-rich, they can be even more effective when mixed with other substrate materials. Adding materials like straw, sawdust, or coco coir can create a more balanced substrate that supports robust mycelium growth and fruiting. Here’s how to mix coffee grounds with other materials:
- Choose Your Additional Materials: Common materials to mix with coffee grounds include straw, hardwood sawdust, and coco coir. These materials provide additional structure, moisture retention, and nutrients.
- Mixing Ratios: A common ratio is 50% coffee grounds and 50% other materials. However, you can adjust this ratio based on your specific needs and the type of mushroom you’re growing.
- Combine the Materials: In a large container, thoroughly mix the coffee grounds with the additional substrate materials. Ensure the mixture is well combined and evenly distributed.
- Check Moisture Levels: After mixing, perform a squeeze test to check the moisture content. The substrate should be moist but not waterlogged. If it’s too dry, add a little water; if it’s too wet, add more dry material.
Mixing coffee grounds with other substrate materials can help create a more diverse and resilient growing environment for your mushrooms, leading to healthier growth and better yields.
Step 5: Inoculating the Coffee Grounds with Mushroom Spawn
After the coffee grounds have been pasteurized and mixed (if desired), it’s time to inoculate them with mushroom spawn. Inoculation is the process of introducing mushroom spawn to the substrate, allowing the mycelium to colonize and eventually produce mushrooms. Here’s how to inoculate coffee grounds:
- Prepare the Spawn: Purchase mushroom spawn from a reputable supplier, choosing a strain that’s well-suited to coffee grounds, such as oyster mushrooms.
- Mix the Spawn with the Substrate: In a clean environment, mix the cooled coffee grounds with the mushroom spawn. Use clean hands or sterilized tools to evenly distribute the spawn throughout the substrate.
- Pack into Containers: Once the spawn is mixed in, pack the substrate into clean, breathable containers, such as grow bags or plastic tubs with holes for air exchange. Avoid packing the substrate too tightly, as this can hinder air circulation.
- Seal and Incubate: Seal the containers with a breathable material, such as a filter patch or loosely secured plastic wrap. Place the containers in a warm, dark location with a temperature of around 70-75°F for incubation. During this time, the mycelium will colonize the coffee grounds, turning them white as it spreads throughout the substrate.
- Monitor Progress: Regularly check the containers for signs of colonization. The substrate should be fully colonized within 2-4 weeks, depending on the mushroom species and environmental conditions.
Maintaining and Monitoring Your Mushroom Substrate
Once your coffee grounds substrate has been inoculated, it’s important to maintain the right conditions to support healthy mycelium growth and eventual fruiting. Here are some tips for maintaining and monitoring your mushroom substrate:
Monitoring Moisture Levels
Maintaining the correct moisture level in your substrate is crucial for successful mushroom cultivation. The substrate should remain moist but not overly wet. Here’s how to monitor and adjust moisture levels:
- Regular Checks: Regularly check the substrate’s moisture content by performing a squeeze test. If the substrate feels too dry, mist it lightly with water. If it’s too wet, allow it to air out by opening the container or loosening the covering.
- Humidity Control: Consider using a hygrometer to monitor the humidity levels in your growing environment. Maintaining proper humidity levels (around 85-95%) will help prevent the substrate from drying out and ensure successful fruiting.
Preventing Contamination
Contamination is one of the biggest challenges in mushroom cultivation. To minimize the risk, follow these guidelines:
- Work Cleanly: Always work in a clean environment when handling your substrate and spawn. Wash your hands thoroughly and use sterilized tools to prevent introducing contaminants.
- Monitor for Mold: Keep an eye out for signs of contamination, such as green, black, or white mold. If you notice contamination, remove the affected area immediately to prevent it from spreading to the rest of the substrate.
Promoting Fruiting
Once the substrate is fully colonized, it’s time to initiate fruiting. This involves exposing the mycelium to the right conditions that trigger mushroom production. Here’s how to promote fruiting:
- Lower Temperature: Lower the temperature of the growing environment to around 60-65°F to encourage fruiting. Some mushroom species may require even cooler temperatures.
- Increase Humidity: Maintain high humidity levels (around 90-95%) to support fruiting. You can achieve this by misting the substrate regularly or using a humidity tent.
- Provide Light: Mushrooms don’t require intense light, but indirect light (such as ambient room light) can help trigger fruiting. Avoid direct sunlight, as it can dry out the substrate.
Conclusion: Growing Mushrooms with Coffee Grounds Substrate
Using coffee grounds as a mushroom substrate is a sustainable, cost-effective, and nutrient-rich way to grow mushrooms at home. By following the steps outlined in this guide, you can prepare coffee grounds to create an ideal environment for mushroom mycelium to thrive. From collection and pasteurization to inoculation and maintenance, each step is crucial to ensuring a healthy and successful mushroom grow.
Remember, the key to success lies in maintaining proper moisture levels, preventing contamination, and providing the right conditions for fruiting. With patience and attention to detail, you’ll be rewarded with a bountiful harvest of homegrown mushrooms, all while contributing to a more sustainable and eco-friendly lifestyle.
Frequently Asked Questions
Why are coffee grounds a good substrate for mushrooms?
Coffee grounds are rich in nutrients, particularly nitrogen, which is essential for mycelium growth. They are also widely available and help reduce waste, making them an eco-friendly and cost-effective option for mushroom cultivation.
Do I need to pasteurize coffee grounds before using them as a substrate?
Yes, pasteurization is important to eliminate harmful microorganisms that could compete with the mushroom mycelium. Pasteurizing coffee grounds ensures a clean environment for mycelium growth.
Can I mix coffee grounds with other materials for better results?
Yes, mixing coffee grounds with materials like straw, sawdust, or coco coir can create a more balanced substrate that provides additional structure, moisture retention, and nutrients for mushroom growth.
How do I know if my coffee grounds substrate has the right moisture content?
Perform a squeeze test: take a handful of the substrate and squeeze it tightly. If a few drops of water come out, the moisture level is perfect. If water streams out, it’s too wet; if no water comes out, it may be too dry.
Can I reuse coffee grounds substrate after harvesting mushrooms?
It’s generally not recommended to reuse the substrate after harvesting, as the nutrients will be depleted. It’s best to prepare a fresh batch of substrate for each new mushroom grow.