
How to Make a Basic Mushroom Substrate with Coco Coir
Share
How to Make a Basic Mushroom Substrate with Coco Coir
Coco coir is a versatile and sustainable material made from the fibrous husks of coconuts, and it’s becoming increasingly popular as a mushroom substrate. Its excellent moisture retention, aeration, and availability make it a great choice for both beginner and experienced mushroom cultivators. In this guide, we’ll walk you through the steps to make a basic mushroom substrate using coco coir, providing you with everything you need to start growing your own mushrooms at home.
Key Takeaways
- Coco coir is an eco-friendly and effective substrate for mushroom cultivation, particularly for species like oyster and lion’s mane mushrooms.
- Preparing coco coir as a mushroom substrate involves rehydration, pasteurization, and mixing with other materials like vermiculite or gypsum.
- A well-prepared coco coir substrate supports healthy mycelium growth and optimal moisture retention, making it ideal for small home grows.
Why Use Coco Coir as a Mushroom Substrate?
Coco coir is favored by mushroom growers for several reasons. It’s an eco-friendly byproduct of the coconut industry, making it a sustainable choice for those looking to reduce their environmental impact. Coco coir is also highly effective as a substrate because it retains moisture well, provides good aeration, and is resistant to contamination compared to other organic materials.
These properties make coco coir an ideal substrate for mushrooms like oyster, lion’s mane, and even shiitake when mixed with other materials. Additionally, coco coir is widely available and relatively inexpensive, making it accessible for home growers.
Materials You’ll Need
Before you begin, gather the following materials to prepare your coco coir substrate:
- Coco Coir Bricks or Blocks: These compressed forms of coco coir need to be rehydrated before use. You can find them at garden centers or online.
- Vermiculite: Vermiculite is often mixed with coco coir to improve moisture retention and aeration.
- Gypsum (optional): Gypsum adds calcium and sulfur, which are beneficial for mycelium growth.
- Large Container or Bucket: For rehydrating and mixing the coco coir and other ingredients.
- Boiling Water: To rehydrate the coco coir and help pasteurize it.
- Thermometer: To monitor the temperature during pasteurization.
- Mixing Tools: Such as a sturdy spoon or your hands (wearing gloves) for mixing the substrate.
Step-by-Step Guide to Making a Basic Mushroom Substrate with Coco Coir
Follow these steps to prepare your coco coir mushroom substrate:
Step 1: Rehydrate the Coco Coir
The first step is to rehydrate the coco coir bricks or blocks. Here’s how:
- Place the Coco Coir in a Container: Put the coco coir brick or block in a large container or bucket. Ensure the container is large enough to hold the coir once it expands.
- Add Boiling Water: Pour boiling water over the coco coir. The coir will start to expand as it absorbs the water. Depending on the size of the brick, you may need to add several liters of water. A standard 650g coco coir brick typically requires about 3-4 liters of water.
- Allow to Expand: Let the coir sit for 20-30 minutes to fully absorb the water and expand. Once expanded, the coir should be soft, fluffy, and moist.
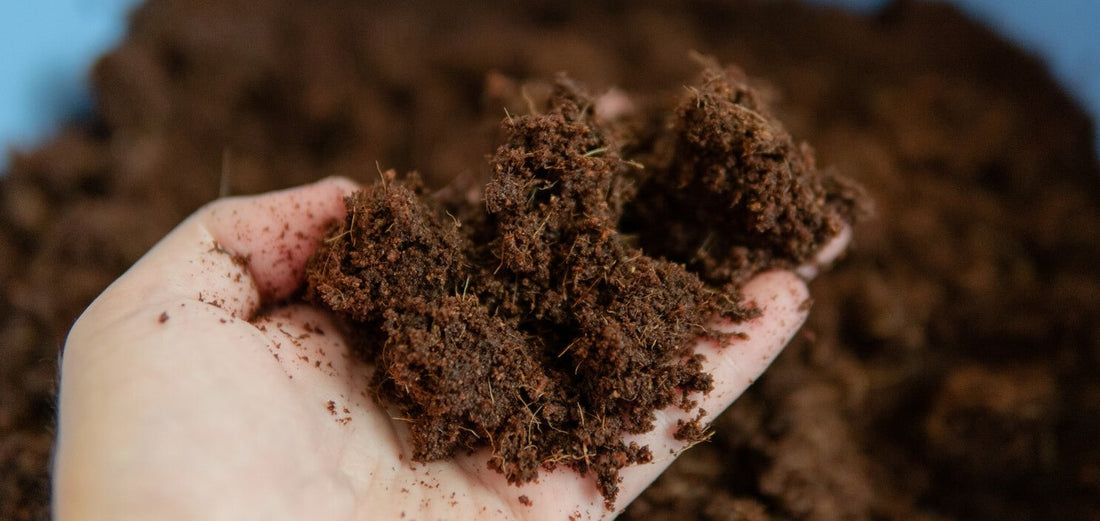
- Fluff the Coir: Use your hands or a mixing tool to break up any remaining clumps and fluff the coir. This ensures that the coir is evenly hydrated and ready for use.
Step 2: Pasteurize the Coco Coir (Optional but Recommended)
While coco coir is generally resistant to contamination, pasteurization can help eliminate any remaining harmful microorganisms. Here’s how to pasteurize the coco coir:
- Heat the Coir: If you haven’t already added boiling water, you can pasteurize the coir by submerging it in hot water at a temperature of 160-170°F (71-77°C) for about 60 minutes. Use a thermometer to monitor the temperature, ensuring it stays within the recommended range.
- Drain and Cool: After pasteurization, drain the excess water from the coir and allow it to cool to room temperature. Spread it out on a clean surface or in a clean container to speed up the cooling process.
Step 3: Mix in Vermiculite and Gypsum (Optional)
To enhance the coco coir substrate, you can mix in other materials like vermiculite and gypsum. Vermiculite improves moisture retention and aeration, while gypsum adds beneficial nutrients. Here’s how to do it:
- Add Vermiculite: For every 650g of coco coir, add about 2-3 cups of vermiculite. Adjust the amount based on the texture and moisture level of the substrate.
- Add Gypsum (Optional): If using gypsum, add about 1/4 cup for every 650g of coco coir. Mix it thoroughly with the coir and vermiculite.
- Mix Well: Use your hands or a mixing tool to thoroughly combine the coir, vermiculite, and gypsum. The final substrate should be light, fluffy, and slightly moist but not waterlogged.
Step 4: Check the Moisture Level
Moisture is key to successful mushroom cultivation, so it’s important to ensure your substrate has the right moisture content. The substrate should be moist but not dripping wet. Here’s how to check:
- Squeeze Test: Take a handful of the substrate and squeeze it tightly. If a few drops of water come out, the moisture level is perfect. If water streams out, it’s too wet—add more vermiculite or dry coir to balance it out.
- Adjust as Needed: If the substrate feels too dry, you can add a little more water and mix it in until it reaches the right consistency.
Step 5: Use or Store the Substrate
Your coco coir substrate is now ready to use. You can either inoculate it immediately with mushroom spawn or store it for later use. Here’s what to do:
- Immediate Use: If you’re ready to start growing, pack the substrate into your growing containers or bags, and inoculate it with mushroom spawn.
- Storage: If you’re not using the substrate right away, store it in a clean, airtight container in a cool, dark place. The substrate should stay fresh for a few weeks if stored properly.
Tips for Success with Coco Coir Substrate
Here are some additional tips to help you get the most out of your coco coir substrate:
Maintain Cleanliness
Contamination is one of the biggest challenges in mushroom cultivation. Always work in a clean environment, use sterilized tools, and wash your hands before handling the substrate. This reduces the risk of introducing contaminants that could hinder mushroom growth.
Monitor Moisture Levels Regularly
Even after preparing your substrate, it’s important to regularly check moisture levels throughout the growing process. The substrate should remain moist but not overly wet. If you notice the substrate drying out, mist it lightly with water to maintain optimal conditions.
Experiment with Ratios
Don’t be afraid to experiment with different ratios of coco coir, vermiculite, and gypsum to find what works best for your specific mushroom species. Different mushrooms have varying moisture and nutrient requirements, so adjusting the substrate mix can help optimize growth.
Conclusion: Growing Mushrooms with Coco Coir Substrate
Coco coir is a fantastic material for mushroom cultivation, offering a sustainable, effective, and easy-to-use substrate for home growers. By following the steps outlined in this guide, you can prepare a basic coco coir substrate that supports healthy mycelium growth and successful mushroom production.
Whether you’re new to mushroom cultivation or looking to expand your growing techniques, coco coir is a versatile option that can yield impressive results. Remember to maintain cleanliness, monitor moisture levels, and adjust your substrate mix as needed to create the perfect growing environment for your mushrooms.
Frequently Asked Questions
Why is coco coir a good substrate for mushrooms?
Coco coir is an excellent substrate for mushrooms because it retains moisture well, provides good aeration, and is resistant to contamination. It’s also an eco-friendly and sustainable material, making it a popular choice for home growers.
Do I need to pasteurize coco coir before using it as a substrate?
While coco coir is generally resistant to contamination, pasteurization is recommended to eliminate any remaining harmful microorganisms. Pasteurizing coco coir helps create a clean environment for mycelium to thrive.
Can I mix other materials with coco coir for better results?
Yes, you can mix coco coir with other materials like vermiculite or gypsum to improve moisture retention, aeration, and nutrient content. This can enhance the overall effectiveness of the substrate for mushroom growth.
How do I know if my coco coir substrate has the right moisture level?
A simple squeeze test can help you determine if the substrate has the right moisture level. When you squeeze a handful of substrate, a few drops of water should come out. If water streams out, it’s too wet; if no water comes out, it may be too dry.
Can I reuse coco coir substrate for multiple mushroom grows?
It’s not recommended to reuse coco coir substrate for multiple grows, as the nutrients will be depleted after the first crop. It’s best to prepare a fresh batch of substrate for each new mushroom grow.